Week 2: Electromagnetism & Energy Transfer
Grade 8 Science | Rosche | Kairos Academies
MS-PS2-3 Forces and Interactions
The Phenomenon: The Generator Mystery
Anchoring Context & Focus Question
The Scene: You are at a science museum. You grab the handle of a crank generator and start spinning. A light bulb glows bright. No batteries. No plug. Just you spinning a handle and two magnets inside a coil of wire. Meanwhile, at a power plant 100 miles away, giant turbines spin day and night — and that spinning becomes the electricity lighting your home.
Driving Question: How can spinning a magnet create electricity?
Connection to Last Week
In Week 1 you studied magnetic fields — the invisible force fields that extend around permanent magnets. This week we ask a bigger question: Can we create magnetic fields without permanent magnets? And then can we flip it — can a changing magnetic field create electricity?
By the end of this week, you will be able to:
- Explain how electric current flowing through a coil creates a magnetic field (electromagnet)
- Describe electromagnetic induction — how a changing magnetic field generates electric current
- Identify the variables that affect the strength of induced current (speed, coil turns, magnet strength)
- Design a device (electric motor) that converts electrical energy into motion using electromagnet principles
Vocabulary
Cognate Strategy: Many science words look similar in English and Spanish — use your Spanish to learn science!
| Term | Spanish | Definition |
|---|---|---|
| electromagnet | electroimán | A magnet created by electric current flowing through a coil of wire |
| solenoid | solenoide | A coil of wire that acts like a bar magnet when current flows through it |
| current | corriente | The flow of electric charge through a conductor (measured in Amperes) |
| electromagnetic induction | inducción electromagnética | Creating electric current by moving a magnet through or near a coil |
| commutator | conmutador | Device that reverses current direction each half-turn to keep a motor spinning |
| armature | armadura | The rotating coil in a motor or generator |

Hook – The Generator Mystery
Observe hand-crank generator powering an LED.

The Mystery
Your teacher holds up a hand-crank generator — a small device with a handle on one side and a wire connected to an LED on the other. When the handle is still, the LED is dark. When you turn the handle, the LED glows. There is no battery anywhere in the circuit.
Inside the generator, a magnet spins near a coil of wire. That is the only difference between "off" and "on." No chemical reaction. No stored charge. Just spinning.
Stop & Think — Before you open the form, answer this in your head:
- What do you think is happening inside the generator when you crank the handle?
- What would happen to the LED if you cranked the handle faster? Slower? What if you stopped completely?
- Where is the energy coming from — and where is it going?
Hold your ideas in your head, then share with a partner before you write anything down.
Worked Example and Simulation – Building a Simple
Electromagnet
How to Analyze an Electromagnet — Step by Step
The Problem:
A student winds 20 turns of copper wire around an iron nail and connects both ends of the wire to a battery. The student holds the nail near a paper clip and the paper clip jumps up and sticks to the nail. Why is this an electromagnet? What would make it stronger?
Step 1: Identify the three components
Every electromagnet needs exactly three things working together:
- Electric current — the battery pushes electrons through the wire
- A coil — the wire is wound into loops (20 turns here)
- A core — the iron nail sits inside the coil
In this problem: battery = current source, wrapped copper wire = coil, iron nail = core. All three are present.
Step 2: Explain how the field is created
Moving electric charges create magnetic fields — this is a fundamental law of physics. When electrons flow through the wire, each loop of the coil adds its field together. The iron nail amplifies this because iron is a ferromagnetic material: its tiny internal magnetic domains line up with the field, making it much stronger. The result is an electromagnet that acts exactly like a bar magnet — with a north pole and a south pole.
Step 3: Predict what makes it stronger
| Change you make | What happens | Why |
|---|---|---|
| Increase turns (20 → 40) | Stronger field | More loops add their fields together |
| Add a second battery (more current) | Stronger field | More moving charges = more field |
| Swap iron nail for aluminum | Weaker field | Aluminum is not ferromagnetic — it cannot concentrate the magnetic field like iron |
| Disconnect the battery | Field disappears | No current = no magnetic field |
Common Mistake — Don't Fall for This:
"More wire = stronger electromagnet." This is NOT correct. What matters is the number of turns (loops), not how much total wire you use. You could have 3 meters of wire with only 5 loose turns — that is weaker than 1 meter of wire wound tightly into 30 turns. It's the coil geometry, not the wire length, that adds up the magnetic fields.
Now You Try:
A different student uses 50 turns of wire around a plastic pen instead of an iron nail, connects it to the same battery, and holds it near paper clips. Using the three steps above, predict: (1) Will it work as an electromagnet? (2) Will it be stronger or weaker than the nail version? (3) What one change would make the biggest improvement? Discuss with your group before moving to Station 1.
Interactive Simulation: Electromagnetic Induction Lab
Tip: Change one variable at a time and record each trial to discover the relationship between coil turns, speed, and induced current.
Station 1 – Electromagnet
Construction
Build and test electromagnets, identify variables.
Background: Oersted's Accidental Discovery (1820)
In 1820, Danish physicist Hans Christian Oersted was lecturing students when he noticed something strange: a compass needle on his desk twitched every time he connected a battery to a wire nearby. He realized that the electric current in the wire was creating a magnetic field — the first time anyone had ever linked electricity and magnetism together. That accident changed physics forever.
Today you are going to repeat the heart of Oersted's discovery: you will build an electromagnet and systematically change one variable at a time to see what makes it stronger or weaker.
Variable Testing Table — Change ONE variable at a time
| Variable | How to Test It | Expected Result |
|---|---|---|
| Number of turns | Wind 10, then 20, then 30 turns; keep current and core the same | More turns = stronger electromagnet (picks up more paper clips) |
| Current (number of batteries) | Use 1, then 2, then 3 batteries; keep turns and core the same | More current = stronger electromagnet |
| Core material | Try an iron nail, an aluminum rod, and no core (air); keep turns and current the same | Iron core = strongest; aluminum ≈ air (both weak) |
Remember: Count the number of paper clips your electromagnet can hold as your measure of strength — record each trial before you change anything.
Sentence Starters for Your Observations (Tiered Support)
- "When I increased the number of turns from ___ to ___, the electromagnet ___________."
- "I think this happened because ___________."
- "The variable that had the biggest effect on strength was ___________ because ___________."
- "One result that surprised me was ___________ because I expected ___________."

Station 2 – Electromagnetic Induction
Lab
Investigate factors affecting induced current.
The Key Insight — Read This Before You Start
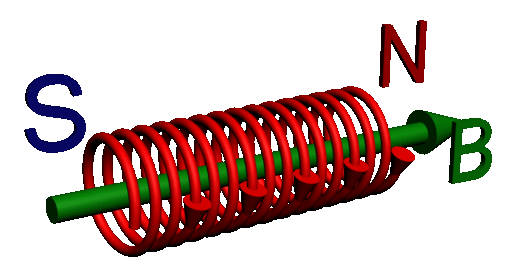
A stationary magnet sitting inside a coil produces ZERO current. Zero. Nothing.
Current is only induced when the magnetic field through the coil is changing. That means the magnet must be moving — pushing in, pulling out, or spinning. The moment the magnet stops, even if it is still inside the coil, the current drops to zero. This is the single most important idea in electromagnetic induction and the one that confuses people most.
Data Collection Table
| What you change | What you observe (galvanometer) | Induced current level |
|---|---|---|
| Move magnet in — fast | Large needle deflection | Higher |
| Move magnet in — slow | Small needle deflection | Lower |
| Hold magnet still inside coil | No deflection at all | ZERO |
| Use coil with more turns | Larger deflection than fewer turns | Higher |
| Use a stronger magnet | Larger deflection than weaker magnet | Higher |
Test each condition and record what the galvanometer needle actually does — then compare to the expected results.
Sentence Starters for Your Observations (Tiered Support)
- "When the magnet was moving ___________, the current was ___________ because ___________."
- "When I held the magnet still, the current was ___________, which tells me that ___________."
- "The pattern I notice is that current only flows when ___________."
- "Increasing the number of coil turns made the current ___________ because ___________."

Station 3 – Design an Electric Motor
Apply electromagnetism to device design.

Engineering Challenge: Design a Simple Electric Motor
At Stations 1 and 2 you discovered two principles: (1) electric current creates magnetic fields, and (2) changing magnetic fields create electric current. Now you flip it into engineering: use what you know to design a device that converts electrical energy into continuous mechanical motion — a motor.
Your challenge is to sketch a design for a simple motor and explain the function of each part. You do not need to build it — you need to think through the design and justify your choices using electromagnetic principles.
Your Design Must Include All 4 Elements
| # | Required Element | What it does |
|---|---|---|
| 1 | Rotating coil (armature) | Carries current; becomes an electromagnet that is pushed and pulled by the permanent magnets, causing rotation |
| 2 | Permanent magnets | Create the fixed magnetic field that the armature rotates within; provide the push-pull force |
| 3 | Commutator | Reverses the direction of current in the armature every half-turn so the coil always gets pushed the same rotational direction — this is what makes continuous spinning possible |
| 4 | Power source connection | Supplies the steady current; connects through the commutator via brushes (sliding contacts) so electricity flows even as the armature spins |
Energy Transformation Chain
Electrical energy → Magnetic energy → Mechanical energy (rotation)
The battery's electrical energy drives current through the armature. The current creates a magnetic field (electrical → magnetic). That field interacts with the permanent magnets to create a turning force (magnetic → mechanical). The commutator keeps this cycle going continuously.
Hint About the Commutator
Without a commutator, the armature would rotate exactly half a turn, stop, and reverse — oscillating back and forth instead of spinning continuously. The commutator flips the current direction at exactly the right moment so the magnetic force always pushes the coil forward. Think of it as a timing switch built right into the rotating shaft. This is what makes continuous rotation possible.
Exit Ticket – Electromagnetism
Integration
Synthesize understanding of electromagnetism and energy transfer.
From Your Classroom to the Power Grid
Everything you investigated this week — electromagnets, induction, motors — is the same science that powers the modern world. At a coal, natural gas, or nuclear power plant, the fuel heats water into steam. The steam spins a turbine. The turbine spins a coil of wire inside a massive electromagnet. Electromagnetic induction produces alternating current. Transformers step the voltage up for long-distance transmission, then step it back down for your home. Every time you flip a light switch, you are using Oersted's 1820 discovery.
Wind turbines and hydroelectric dams do the same thing — they just use wind or falling water to spin the coil instead of steam. Even the generator you saw at the start of class is identical in principle to a 500-megawatt turbine. Same science. Different scale.
Enrichment & Extension
Optional content if you finish early or want to go deeper.
Scientist Spotlight: Michael Faraday
Michael Faraday (1791–1867) was a self-taught scientist who discovered electromagnetic induction in 1831. Born to a poor blacksmith family, he had no formal education but became one of the most influential scientists in history. His discoveries led to the electric motor, generator, and transformer — the foundations of modern civilization’s electrical infrastructure.
Environmental Justice: Power Infrastructure & Community Impact
Communities near power plants and electrical infrastructure face disproportionate pollution exposure. Low-income neighborhoods are more likely to be located near high-voltage power lines and substations. Transitioning to renewable energy (wind and solar generators use the same electromagnetic principles) can reduce these disparities while applying the science of electromagnetic induction to build a more equitable energy future.
Week 2 Complete!
Next Week: Electric Circuits & Power — why do the lights dim?